REBOL Quick Start: Part 1
REBOL's Designer
Revised: 12-Mar-2024
Chapters
- Part 1: Start Here (below)
- Part 2: REBOL Scripts
- Part 3: Writing Scripts
- Part 4: Help from the Console
- Part 5: Files, Directories, and Playing Music
- Part 6: GUI Form and Submit to Server
Purpose
So you want to learn REBOL, but where do you start?
Yes, REBOL is unique in many ways. A lot has been written about REBOL, but right now you don't want to hear about REBOL's elegant design concepts or how it creates a whole new way of programming... you just want to try it out! Am I Right?
Ok, I hear you. That's why I wrote this tutorial. Time is short. Let's get to it. You can return to the details later. Many other tutorials are available.
Start Here
Here's the plan... we will start by downloading REBOL, then we will check out a few demos, and finally look at their code to see how they work. Along the way, I will point out important concepts that you need to know.
Step 1: Download
For this tutorial (and most everything else) you will need to run REBOL/View, the graphical version of REBOL.
You do not need REBOL/Core. That is the server (non-graphical/console) version of REBOL.
Click here to download REBOL/View now. It is very small. Over DSL, it downloads in a few seconds.
Step 2: Install
Run the file that you downloaded and REBOL will install itself (on Windows).
Don't worry. REBOL is not going to mess with your computer. It keeps installation to a minimum, creating key folders, icons, and file associations. If you want, when you are done, you can easily uninstall REBOL.
(I should point out that the REBOL installer is written in REBOL itself. It's a good example in itself.)
Step 3: Run
You will now see a REBOL icon on your desktop. Click the icon to start REBOL. (On Linux, BSD, OS X, etc. you start by typing ./rebol in a shell.)
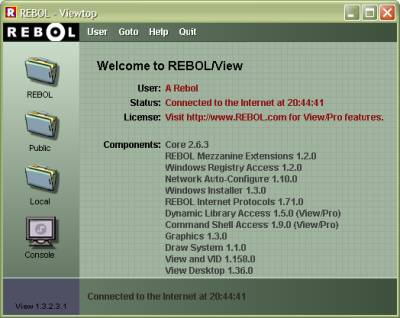
The REBOL window will open, and you will see the REBOL Viewtop (a mini desktop). A requestor will pop up to tell you that you need to set your user settings. Click, ok.
Now click the "User" link at the top of REBOL. This provides access to REBOL Viewtop preferences. You can set your user name (or leave it as is), email address, and Internet access proxy settings (if those are necessary to connect). The settings are not mandatory to run REBOL. See Proxy Setup for details.
Step 4: Connect
REBOL/View automatically connects to REBOL.com to download a few file folders and check for updates.
If for some reason REBOL cannot connect to the Internet, you will not be able to see the necessary folders to try the demos, examples, and tools. After a minute or two, REBOL will give up.
Look at the bottom of the REBOL window, and a progress bar should flash by, and you should see a line "Connected to the Internet at ..." If so, you are good to go.
If not, and you see "Local", then you did not connect. Check your "User" preferences again. Set your proxy settings if needed. REBOL uses HTTP (web) on the regular port (80), so if your normal web browser works, so should REBOL. You can click "local" at the bottom of the window to try to connect again.
If you cannot get it to work, please let me know!
Browsing REBOL Scripts
The REBOL Viewtop is a little micro desktop/browser. Yes, it is written in REBOL, and the source code is online, so when you get good enough, you can improve on it.
The Viewtop provides an easy way to jump into the world of REBOL, so let's just do that. Click on the REBOL folder, and REBOL will load and open the "REBOL Central" folder. Click on the Demos folder.
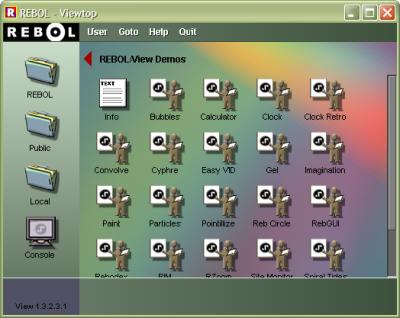
Now, have at it. Click on the various icons to see a variety of simple REBOL demos.
For example, click on "Clock". You will see something like:
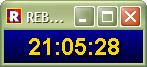
Ok, simple enough, but not very impressive, right? Now, grab the lower right corner and drag it to see the clock resize as large as you want. Still pretty basic.
But, here's the cool part. Go back to the Viewtop and right click on "Clock". You will see information about the clock demo:
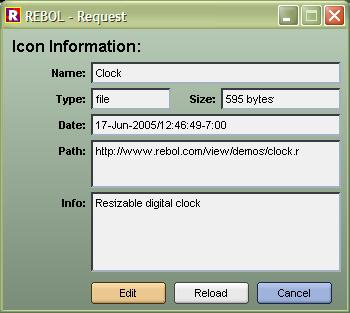
At this point you're supposed to say, "Wow! It's only 595 bytes!" So, go ahead and say that out loud right now.
View the Source Code
Next, let's look at the source code for "Clock". Click the Edit button in the icon information box above. The source code will open in REBOL's tiny built-in source editor. (Yep, that source code is available for you too.)
You will see:
REBOL [
    Title: "Digital Clock"
    Version: 1.3.3
    Author: "Carl Sassenrath"
    Purpose: {A simple digital clock.}
]

f: layout [
    origin 0
    b: banner 140x32 rate 1
        effect [gradient 0x1 0.0.150 0.0.50]
        feel [engage: func [f a e]
                        [set-face b now/time]]
]

resize: does [
    b/size: max 20x20 min 1000x200 f/size
    b/font/size: max 24 f/size/y - 40
    b/text: "Resize Me"
    b/size/x: 1024 ; for size-text
    b/size/x: 20 + first size-text b
    f/size: b/size
    show f
]

view/options/new f 'resize
resize
insert-event-func [
    if event/type = 'resize [resize]
    event
]
do-events
This is the code for the clock demo. Hey, I know that author.
So, that's an important point to know: Just like the HTML source for the world wide web, you can see the source code for REBOL scripts. Now you have one of the main tools for learning REBOL: hundreds of examples to dissect. And, when you start to write your own code, the old cut and paste approach can be useful... just as it is in HTML.
Browse around the source to a few of the other demos. Although all of them are quite small, many of them are fairly advanced. Don't worry, you'll figure them out as you learn more about REBOL...
Next: Anatomy of a REBOL Script
In the next part of this Quick Start, you will learn the basic ideas of REBOL scripts. We will modify the above script (and make it even smaller!), as well as create a couple other example scripts.
Click here to go to Quick Start: REBOL Scripts
Give Me Feedback
Let me know what you think of this Quick Start tutorial: contact us.